Getting started
What is Missinglettr?
1 - Set Up your Missinglettr Workspace
2 - Connect your Social Media Account
3 - Connect a Content Source
4 - Set up branding for your campaigns
5 - Set up Schedule Templates
6 - Set up Dates and Times for my posts
AI features in MissingLettr
Campaigns
Errors on campaign creation
AI Settings
What is a campaign?
Author specific campaigns
Creating and editing content templates
Customize the font for your branding
Customizing Quote Bubbles
Edit an Active campaign
General Settings
How to choose which page or group Missinglettr should send your campaign to
Image guidelines for campaigns
Manual Campaigns
Media assets download
Regenerate a campaign
UTM Parameters support
What are Drip Campaign goals?
What will happen to my schedule if I pause and then re-approve a campaign?
Which URL shorteners can I use for my campaigns?
Why do most of my posts use the first time slot?
Social media
General
Character limits for different platforms
How to delete a social profile
Which social media accounts can I connect?
Why am I being asked to reauthenticate my social profile?
X
Having problems connecting to Facebook?
I can't connect my Facebook GROUP
I've connected my Facebook PAGE, but nothing is posting
My Facebook timeline is not available for selection
My plain text Facebook post is being published with a link
Medium
Having problems connecting to LinkedIn ?
How to reauthenticate LinkedIn
My LinkedIn company pages are not available for selection
Problem connecting to LinkedIn
Bluesky
Mastodon
Let's get technical
Integrations
Connecting your RSS feed to Missinglettr
Content from my blog posts aren't being extracted
How Google Analytics treats our shortened URLs
How to add your Youtube channel
No content found for a campaign ? Here’s how you can help us recalibrate your webpage
Setup an RSS feed
What's an RSS feed?
Sites
Can I change permissions for my team members?
How can I add/remove team members?
How to add a site
How to remove a workspace
My site's URL isn't being recognized
Security
Payments and billing
Common Questions
Does Missinglettr work with languages other than English?
How long will I wait for a response from Customer Support?
I have a feature suggestion, where can I submit it?
I want to exercise my rights under GDPR
Is Missinglettr GDPR compliant?
Which blogging platforms does Missinglettr work with?
Affiliate
Curate
Curate Auto-Schedule
Curate Quality Guidelines
Do you guarantee a minimum number of shares via Curate?
How likely is it that my Curate content will be shared?
Why is Curate reporting a problem loading my URL?
Analytics
Video Presentation
- All Categories
- Campaigns
- Creating and editing content templates
Creating and editing content templates
Content templates define how quotes and titles from your blog posts are organized and positioned within campaign posts, as well as how links and hashtags are positioned. New lines and emojis are supported as well.
Before you start editing templates, it's important to know which building blocks are available:
- Blog title - {{title}}
- Quote from the blog post - {{quote}}
- Twitter handle of the author - {{author_twitter}}
- Links - {{link}}
- Your own text
You can access this feature by clicking “Content templates” in the “Settings” menu.
You'll see this window:
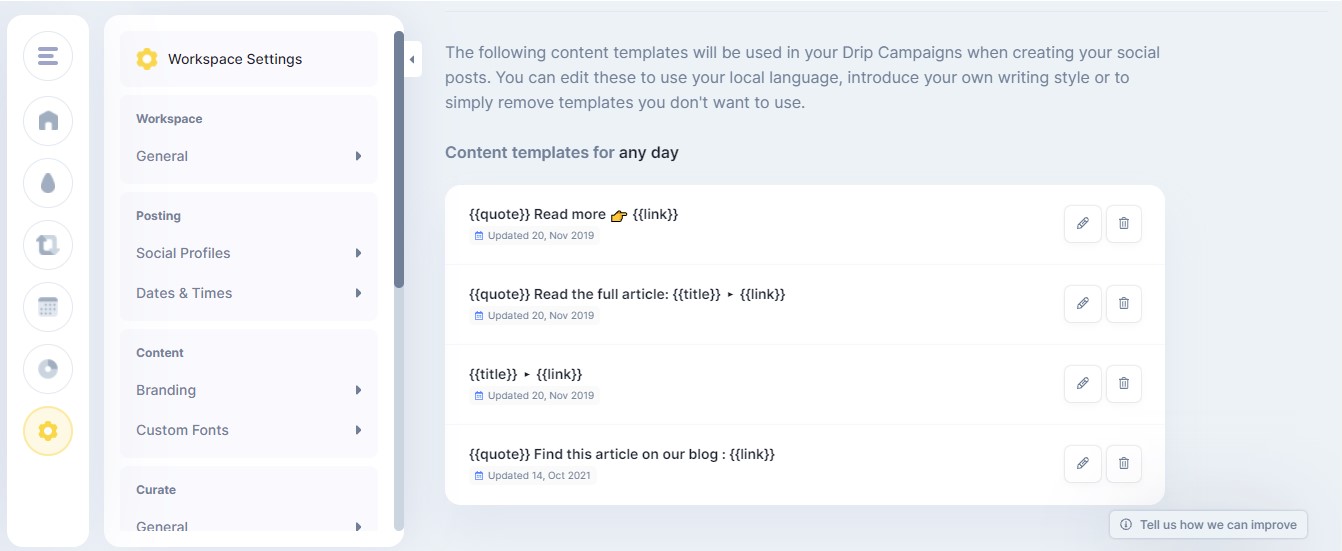
It's possible to edit/remove existing content templates and add new ones. To reveal the edit button click on the dots.
Once the edit/add button is clicked, a popup will appear:
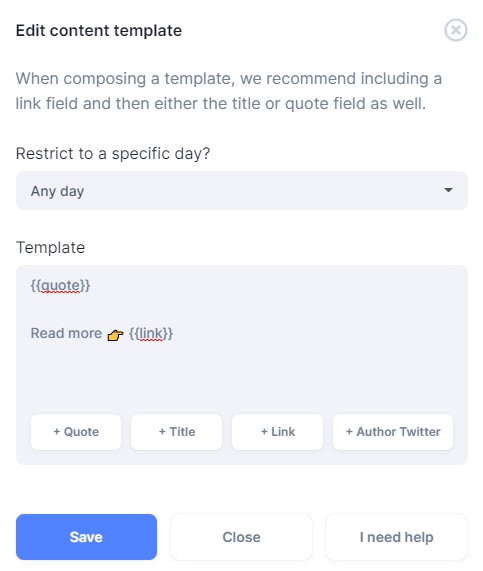
You can combine each block, or element, with your own text.
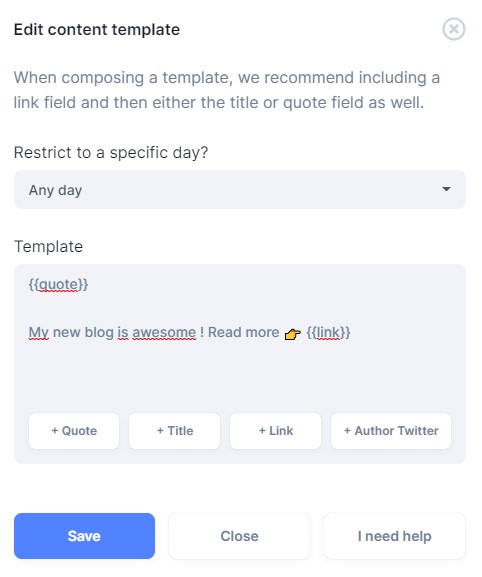
For example, say we want to create a template that includes, "My new blog post is awesome! Read more — link to your blog post". We can do this by writing the "My new blog post is awesome! Read more—" first (and add an emoji!) and clicking on the "+ Link" box. Once done, the new template should look like this:
Then, say we want the link to our blog post to be added afterward, on a separate line. We can add new line characters by pressing Enter while editing the template.
Finally, let’s add some emojis.
Your device’s emoji keyboard will work just fine — if you are on a Mac, reveal it via Ctrl + CMD + Space. On Windows, use the Windows key + . (dot or period key).
Once you are happy with the content template, hit Save and it will be added to your list of templates.
Please note that editing content templates is only possible for users on the Pro, Agency and Team plans.
Further Reading